Showing posts with label Routine. Show all posts

17 Mar 2014

Seven Deadly Sins - Greed (Everyday Makeup Tutorial)

Recently I've had this idea of having a different everyday makeup look that represents one of the deadly sins, there are a lot of tutorials to do with the seven deadly sins but majority of them are not looks you could wear on a normal day but more for halloween or party's.
I also wanted to pursue this "series" as I have a love for makeup and constantly looking for new products to buy and try but I never really get round to using them as I rarely wear makeup and I want this change. I have a love/hate relationship with makeup, I enjoy looking at it and buying it and creating new looks but I hate wearing it and applying it, its time consuming and I'm pretty lazy when it comes to taking pride in my appearance and I also don't like the feel of it on my face but I think that's because I'm not use to it.
Once I've applied the makeup I do feel that bit more confident (when it goes/looks ok) so by doing these looks i'm hoping I will get into a routine of taking more pride in my appearance. Just for the record I am 100% comfortable going out with no makeup so this isn't to please or impress other people it's simply something I want to do.

To start with I chose Greed : also known as avarice, cupidity or covetousness, is the inordinate desire to possess wealth, goods, or objects of abstract value with the intention to keep it for one's self, far beyond the dictates of basic survival and comfort.

My interpretation of greed is showing off how much wealth you have, so to achieve this look I decided to use gold as my main colour. Here is the final look:


Although Greed is about showing off I kept this look quite minimal as I wanted it to be a "day time" look. Otherwise  I would of gone heavier on the gold. Less is more in my opinion.

This is how I achieved this look:

Step 1: Prep.


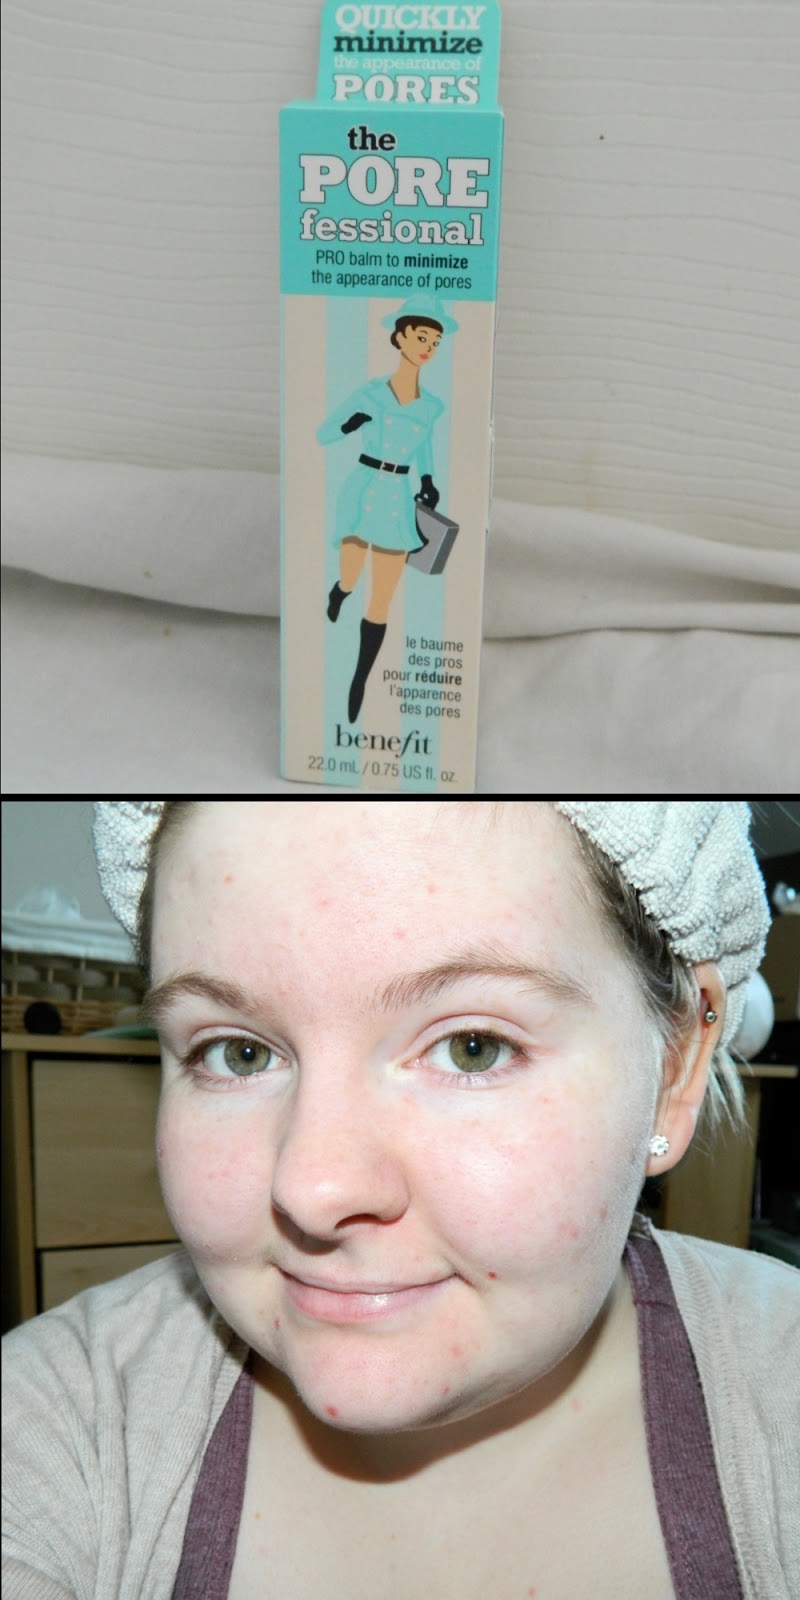
I washed my face and applied my normal skincare routine which you can check out HERE. I then applied a face primer, I used The Porefessional by Benefit, this is quite a high end primer but there are much more affordable options on the high street. I apply a primer as it helps keep the foundation on for longer, it gives your skin a smoother appearance and also helps maintain shine if you have oily skin.  

Step 2: Foundation.


I used Max Factor Miracle Touch Liquid Illusion Foundation in Creamy Ivory, this foundation is my all time favourite, It gives a flawless finish and gives a pretty full coverage, Yet it is ultra lightweight and almost undetectable on the skin, it melts into the skin without disappearing. I love it. 

Step 3: Conceal/Cover. 


The concealer I used is the Collection 2000 Lasting Perfection in Light. This is quite a heavy concealer but it gives amazing coverage. I use it under my eyes to cover any dark circles and lightly over my blemishes and pat it into the skin rather than blending it out as I think this method covers better. 

Step 4: Setting/Powder.


I love my Blank Canvas Contour/Highlight Palette it's a beauty. I used the second Lightest colour all over my face to set my foundation and concealer. Just dust it over with any face powder brush you have. Then get your pout on ready for step 5.

Step 5: Contour.


Sticking with the trusty Blank Canvas Palette I used the two darker shades mixing them together on my brush and contoured in the hollow of my cheeks, down the edges of my nose, along my jaw and temples. I then used the white powder to highlight: on the bridge of my nose, on the top of my cheekbones and bottom of my eyebrow bones, across the center of my forehead and chin. Don't worry it looks quite harsh at first and in the picture I applied a little more than I would so it would show up. The key to contouring is the blending. Blend it all together so there are no harsh lines. 
I chose to contour on this look to give the face some structure and give a more bronzed effect which will complement the gold. 

Step 6: Blush.


I chose to use Sleeks Blush in Lifes A Peach. It's a lovely coral colour which I thought would go with this look. I applied it to the apples of my cheeks before blending out towards my temples. 

Step 7: Highlight.


Even though I'd already highlighted earlier I felt I needed a more of a shimmer look rather than a matte. I don't have a gold highlighter so I used this shimmery light gold eyeshadow from MUA Going For Gold palette. I applied this to center of my nose and the top of my cheekbones, blending it out to give a softer look. 

Step 8: Eye/Lip Prep.

To prep my eyes I used "That gal" face brightening primer by Benefit. I know it's a face primer but because it's a brightening primer I decided to use this on my eyes. I just used trusty old Vaseline on my lips to soften and moisten my lips ready for my lipstick.

Step 9: Eye Base.


I love cream bases, they just seem to be perfect for applying eyeshadows over the top. I used Maybelline Colour 24hr Tattoo in On and On Bronze, I wanted to use Eternal Gold but I couldn't find it :(. 

Step 10: Eyeshadow. 


I used this shimmery gold shade over my lids to "gold" up that base haha. It's from the MUA Undressed Palette which is a dupe of the Urban Decay Naked Palette for a smidgen of the price. 


Going back to the MUA Going For Gold Palette I used the darker Gold on the inner part to the middle of my lid and I used the lighter gold (The one I used for a highlighter) in the inner corner of my eye and under my brow bone. 

Step 11: Eye Contour.


Going back to the MUA Undressed Palette I used the dark shimmery brown on the middle to outer corner of my eyes and then using the matte brown to add depth to the eyes. I brushed this through the crease of my eyelid bringing it down to my lower lash, it should form the shape shown in the picture. ">". When adding depth to the eyes it's better to use a matte colour rather than a shimmer, as shimmers catch light particles and stand out working like a highlighter. 

Step 12: Eyeliner.


Using MUA Liner in black to line the outer corner of my lower lash line and up corner of my eyes to make my lashes look fuller, I then blend it out with my finger to the middle of my eye for a less harsh look. 

Step 13: Mascara.


To finish the eyes I curl my eyelashes which makes me look more "awake" and helps widen the eyes. I then applied a coat of Max Factor False Lash Effect in black to give my lashes a full and thicker effect as I have pretty rubbish lashes. 

Step 14: Brows.


I don't know if you've noticed but my right brow is higher up than the left and I have quite light brows which are very sparse, so I find filling them in finishes the look. I use B. Groomed Eyebrow Pencil in Hazel. I use light strokes for filling my brows in as it gives a more natural look, on my left brow I fill in from the top and on my right I fill in from the bottom to try and even them out lol.

Step 15: Lips.


I used three products on my lips, the first being Revlon Colorburst Matte balm in Audacious it's a pinky coral colour which I thought would compliment the eyes very well. I then used La Color Lipstick in a browny/gold glitter (It doesn't have a name) in the centre of my lips to give a slight ombre/sparkle. I finished of the lips with L'oreal Paris Glam Shine in Infinite Desert. It gives the lips a more plump look and blends the two colours together whilst adding some golden sparkle. 

And that is my finished look for greed. I hope you like it and try it out for yourselves. I think this look is suitable for any occasion, whether it's a day out shopping or a lunch date. Let me know what you think in the comments and if you like this kind of blog post. If so, which look would you like to see next?
Sloth
Lust
Gluttony
Pride
Envy
Wrath. 
Read More

21 Feb 2014

My Current Skincare Routine

Side Note - I just want to thank a few people who have encouraged me to carry on this blog and made me feel as if it's something good and it's nice to know people are actually enjoying it! So Anna-Laura Michael Jackson Hitch if you're reading this then thank you for reminding me and pushing me to carry on as I'm pretty lazy and always put things off! I'm dedicating this post to you!
Lucy, thank you for reading my blog and telling me you like it and encouraging me to do more posts, and last but not least, thank you to my sister Abi for helping me choose what I should post next and constantly giving me advice when I need it.

Now on with the show!!

So over the years i've constantly tried numerous skincare products, probably from about the age of 13/14 when I started to get acne. It's hard to find a good regime that actually helps/keeps your skin in check, there are so many products which promise to improve your skin no matter what type you have, yet a lot of them are a bunch of crap (excuse my language) I dare to think how much I've spent over the years on phony products; eventually after sitting in my draws for months, either get passed down to my sister or chucked because they are useless to me.  

I guess it all depends on your skin type because I know certain products, for instances Garnier; I think if my skin had an arch enemy it would be Garnier products. Every Garnier product I have tried has made my skin super oily, broke me out in hundreds of spots and made my skin itchy (I think I might be allergic to it) so naturally I stay clear of anything made by Garnier. Sorry Garnier, it's nothing personal.
I've heard/read so many people rave about Garnier's bb cream and other products by Garnier which have done wonders for their skin and how it's a "must have item". Basically what I'm trying to say is it's about trial and error with skin products, what suits my skin, might not suits yours, which kind of sucks because it can cost a lot of time and money. Although if I had to suggest any product I would recommend going for ones that are naturally made.

Step 1 - Cleanse 


These are my morning/in the bath cleansers, on the right we have Lush Fresh Farmacy, now for a cleanser I guess this is on the pricey side, for 100g it's just under £5 but to be fair it does last a very long time. I bought this roughly around the end of november at just over 100g, I think it cost me about £6.50, I would say I've used about 2/3 of it now but I don't use it everyday as somedays I will just wash my face with water. I have quite sensitive skin and I find if I use too much product it can actually irritate my skin rather than help it, so I probably use Fresh Farmacy about 2 to 3 times a week. I really like the fact it's a solid bar, rather than a gel/cream, it's a very thick cleanser it kind of feels like a clay (it might be a clay but I don't think it is) It's made up of calming essential oils which help cool and soothe the skin. I also like this because I feel it helps with my oily patches (I have combination - oily skin) and it smooths out my skin. There are two downfalls to it though, 1) the smell, It's not exactly a nice smell, It's not terrible but yeah It's not something you want to smell all day and 2) It doesn't come with a tin or container and the reason I don't like this because it could get contaminated by germs/bacteria, I store mine in a plastic container, you know one of those chinese take away ones haha, I find it a little too big/bulky to take it with me if i'm travelling, so yeah it would be nice if they gave you an option to buy a container for it. https://www.lush.co.uk/product/5913/250g-MEDIUM-Fresh-Farmacy-Cleanser. The second cleanser (on the left) is once again from Lush, it's called Angels On Bare Skin I love this cleanser but it's more of a once a month one, sometimes my skin can get a little dry under my chin and around my nose, my cheeks get a bit red from scarred acne so that's when I tend to use this, it's kind of solid but once you add a little bit of water to it it turns into a milky paste, it really helps tone down redness and even out your skin it lightly exfoliates as well. It's meant for oily skin, but weirdly I prefer to use this when my skin isn't that oily. This costs £6.35 for a small tub but once again it goes a long way, you literally only need the tiniest bit, i'm actually ashamed to admit I've had this product for over a year now (probably isn't hygienic but it still seems okay to me) it doesn't have a use by date but it probably is out of date (still works the same though). Once again not keen on the smell, to be fair most of Lush's face products don't smell that great (except Cupcake mmmmm.) https://www.lush.co.uk/product/6433/100g-Angels-on-Bare-Skin-.


These are my nighttime cleansers aka my lazy ones haha. On the left we have L'oreal Skin Perfection Purifying Cleansing Wipes, I only use these if i've worn make-up that day, as it takes majority of it off. I really like these wipes as they keep my skin balanced, they don't dry me out or make me feeling oily afterwards. They're £2 at Asda which I don't think is bad at all. http://groceries.asda.com/asda-webstore/landing/home.shtml?cmpid=ahc-_-ghs-sna1-_-asdacom-dsk-_-hp#/product/910000299918. On the right we have Simple Kind To Skin Pore Minimising Toning Cleanser, out of the all the products I think this one is my favourite. It's a gel type cleanser but you don't have to wash it off, it melts into your skin and after a few minutes it's pretty much untraceable. I just squeeze a dollop onto a cotton pad (as seen in the picture) and sweep it over my face, it removes so much dirt from your face that it's visible on the pad, kind of gross really, but at least you know it's doing a good job. Since using this I've also noticed my pores seem a lot smaller, and my acne is no where near as bad, when I do get breakouts they're small instead of the really big skin deep ones that hurt which is brilliant, I also like this because it's a toning cleanser which means it's two in one, it saves, time, money, space and effort because I don't have to use a toner. I love simple's range I find it's great for sensitive skin. http://www.superdrug.com/simple/simple-pore-mini-cleanser/invt/584630&bklist=.

Step 2 - Tone


Now i'm not really sure if this is a toner or not but I use it before my moisturiser so I'm classing it as a toner lol. This is a recent product I've been using and so far I can't fault it. Botanics Skin Relief Serum Ultra Calm is a serum which you apply before your daily moisturiser, it's suppose to reduce redness, even skin tone and calm down sore spots and honestly so far it's done all the above. I love the way it just melts into the skin, it makes the skin feel so soft and smooth like a babies bum bum hehe. It also smells amazing, it's kind of an orangey fragrant but I can't really describe it, its just nice okay, so take my word for it. This was a little on the pricey side, but Boot's always seem to have this range on offer, I think I got 1/3 off and I'm glad I bought it because so far I'm in love with it. http://www.boots.com/en/Botanics-Ultra-Calm-Skin-Relief-Serum-30ml_1261985/.

Step 3 - Moisturise


On the right we have Simple Kind To Skin Hydrating Light Moisturiser which I pretty much use every day, even though I have oily skin it's still important to moisturise as your skin can become dehydrated and in turn produce more oil as your skin needs it. What I like about this moisturiser is it's a light 12 hour one which seems to be just about right for me, I've tried oil free moisturisers which have actually dried my skin out, I've tried heavy moisturisers which make my skin to oily as my skin doesn't need that much moisture and pretty much stops absorbing it. It sinks into my skin pretty much instantly so you're not sat rubbing it in for 10 minutes which can be a pain, I also like that it give a matte finish, so it's perfect if you want to apply make-up straight after. It's very cheap for a moisturiser as well which is always a plus! http://www.superdrug.com/simple/simple-hydrating-light-moisturiser-125ml/invt/949073&bklist=. On the left we have Soap and Glory's Beauty Sleep Accelerator which is a 24 hour nighttime moisturiser. Since it's winter and I've been out walking the dog quite a big I've noticed my skin has started to get a little dry so about once a week I will use this before I go to bed, and when I wake up in the morning my skin feels amazing, it drinks up all the goodies and feels ready to face the week. The smell of this product is to die for, it's got a peachy/citrus smell and I think it's my favourite smell out of all my products, it's so yummy I want to eat it. It's quite pricey but if you're using it in small amounts like me then I reckon it's worth it as it will probably last a long time. http://www.boots.com/en/Soap-Glory%C2%99-Beauty-Sleep-Accelerator%C2%99-Night-Flight-Moisture-Miracle_1364180/.

Step 4 - Treatment


Back to trusty old simple. Here we have the Rapid Action Spot Zapper. I find it's near enough impossible to find a spot stick/treatment that actually works, but I guess this is the best of a big bunch, It's not perfect and it doesn't always make a difference, it's kind of a 50/50 product, half the time it helps reduce the spot and the other half it just doesn't touch it, but the reason why I use it, is because unlike other spot treatments it doesn't dry out the skin, so if it doesn't affect the spot then it's not a big deal because it doesn't make it worse. I find it works best on my cheeks, and not so good on my chin/forehead. Still it's not that bad of a price so I think it's worth given it ago. http://www.superdrug.com/simple/simple-spotless-rapid-action-spot-zapper/invt/205719&bklist=.

Step 5 - Lips


Moving onto my lips, yes it's just as important to take of your lips. On the left I use Lush Bubblegum Lip Scrub, this comes in a variety of flavours but bubblegum is by far my favourite, it exfoliates your lips and removes any dead flaky skin, it's really good. It's also made with sugar so of course it tastes divine, it's almost a struggle not to eat the entire pot, I use this every other night before I go to bed and before I apply lipsticks/glosses. It's not that pricey when you think about it because it does last a long time, but as it's just sugar, you could make it at home for 1/3 of the price. https://www.lush.co.uk/product/67/Bubblegum-Lip-Scrub. On the right is Vaseline which is just a standard lip balm I apply after the scrub, it helps keep my lips nice and moistruised, I like this one as it's has aloe vera in it which is a natrual antibacteria so if you sometimes get cold sores like me, I feel it helps keep them at bay before they fully flare up. http://groceries.asda.com/asda-webstore/landing/home.shtml?cmpid=ahc-_-ghs-sna1-_-asdacom-dsk-_-hp#/product/1528095.

There you have it, my current skincare routine. I hope you enjoyed this post and I'll see you next time! 


Read More

© 2011 I'm Just Me, Becky King, AllRightsReserved.

Designed by ScreenWritersArena