Recently I've had this idea of having a different everyday makeup look that represents one of the deadly sins, there are a lot of tutorials to do with the seven deadly sins but majority of them are not looks you could wear on a normal day but more for halloween or party's.
I also wanted to pursue this "series" as I have a love for makeup and constantly looking for new products to buy and try but I never really get round to using them as I rarely wear makeup and I want this change. I have a love/hate relationship with makeup, I enjoy looking at it and buying it and creating new looks but I hate wearing it and applying it, its time consuming and I'm pretty lazy when it comes to taking pride in my appearance and I also don't like the feel of it on my face but I think that's because I'm not use to it.
Once I've applied the makeup I do feel that bit more confident (when it goes/looks ok) so by doing these looks i'm hoping I will get into a routine of taking more pride in my appearance. Just for the record I am 100% comfortable going out with no makeup so this isn't to please or impress other people it's simply something I want to do.
To start with I chose Greed : also known as avarice, cupidity or covetousness, is the inordinate desire to possess wealth, goods, or objects of abstract value with the intention to keep it for one's self, far beyond the dictates of basic survival and comfort.
My interpretation of greed is showing off how much wealth you have, so to achieve this look I decided to use gold as my main colour. Here is the final look:

Although Greed is about showing off I kept this look quite minimal as I wanted it to be a "day time" look. Otherwise I would of gone heavier on the gold. Less is more in my opinion.
This is how I achieved this look:


Read More
I also wanted to pursue this "series" as I have a love for makeup and constantly looking for new products to buy and try but I never really get round to using them as I rarely wear makeup and I want this change. I have a love/hate relationship with makeup, I enjoy looking at it and buying it and creating new looks but I hate wearing it and applying it, its time consuming and I'm pretty lazy when it comes to taking pride in my appearance and I also don't like the feel of it on my face but I think that's because I'm not use to it.
Once I've applied the makeup I do feel that bit more confident (when it goes/looks ok) so by doing these looks i'm hoping I will get into a routine of taking more pride in my appearance. Just for the record I am 100% comfortable going out with no makeup so this isn't to please or impress other people it's simply something I want to do.
To start with I chose Greed : also known as avarice, cupidity or covetousness, is the inordinate desire to possess wealth, goods, or objects of abstract value with the intention to keep it for one's self, far beyond the dictates of basic survival and comfort.
My interpretation of greed is showing off how much wealth you have, so to achieve this look I decided to use gold as my main colour. Here is the final look:

Although Greed is about showing off I kept this look quite minimal as I wanted it to be a "day time" look. Otherwise I would of gone heavier on the gold. Less is more in my opinion.
This is how I achieved this look:
Step 1: Prep.
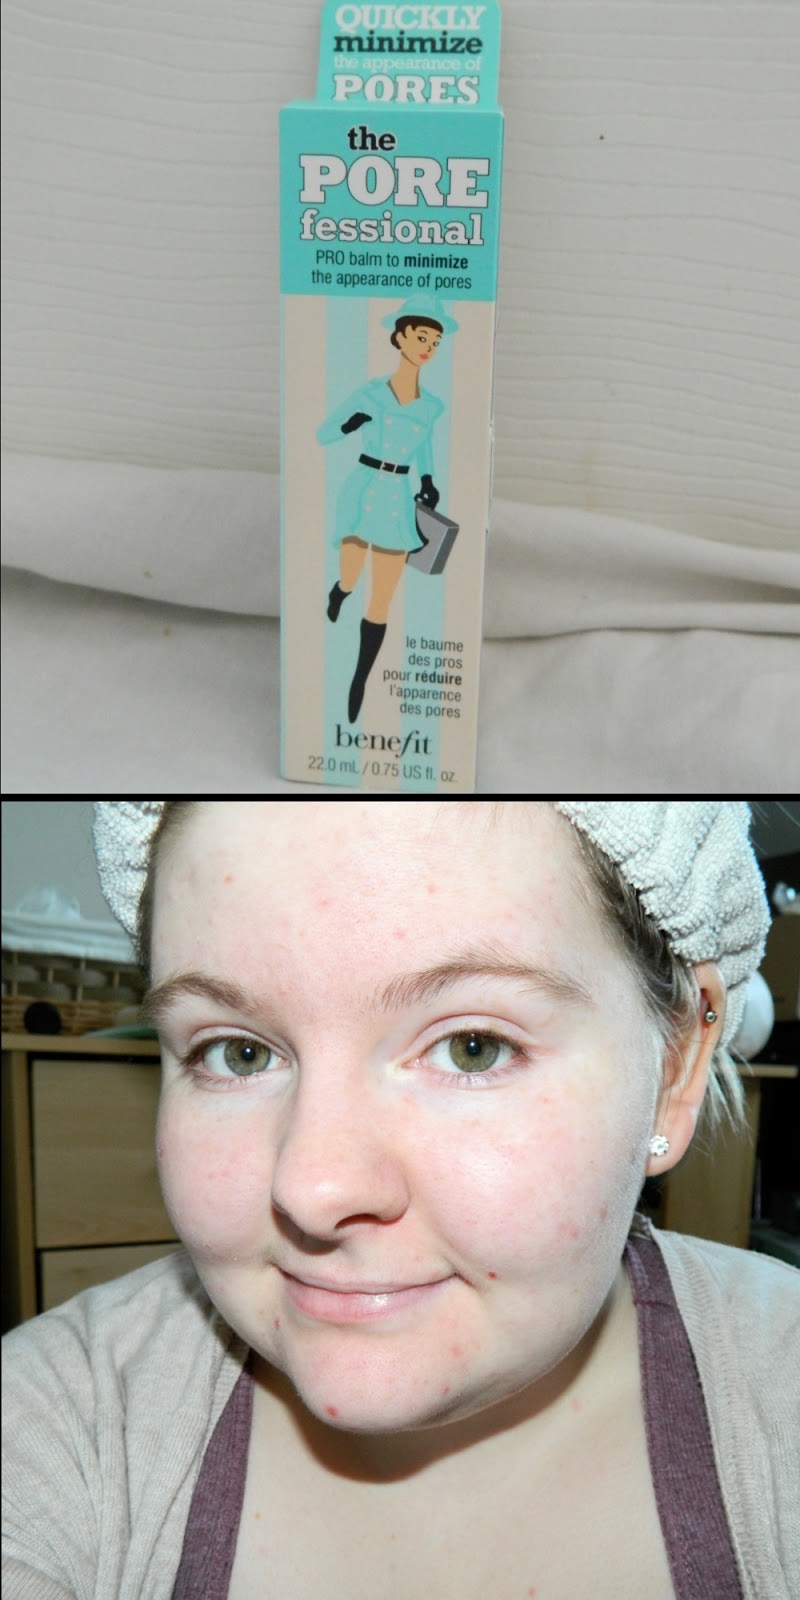
I washed my face and applied my normal skincare routine which you can check out HERE. I then applied a face primer, I used The Porefessional by Benefit, this is quite a high end primer but there are much more affordable options on the high street. I apply a primer as it helps keep the foundation on for longer, it gives your skin a smoother appearance and also helps maintain shine if you have oily skin.
Step 2: Foundation.

I used Max Factor Miracle Touch Liquid Illusion Foundation in Creamy Ivory, this foundation is my all time favourite, It gives a flawless finish and gives a pretty full coverage, Yet it is ultra lightweight and almost undetectable on the skin, it melts into the skin without disappearing. I love it.
Step 3: Conceal/Cover.

The concealer I used is the Collection 2000 Lasting Perfection in Light. This is quite a heavy concealer but it gives amazing coverage. I use it under my eyes to cover any dark circles and lightly over my blemishes and pat it into the skin rather than blending it out as I think this method covers better.
Step 4: Setting/Powder.

I love my Blank Canvas Contour/Highlight Palette it's a beauty. I used the second Lightest colour all over my face to set my foundation and concealer. Just dust it over with any face powder brush you have. Then get your pout on ready for step 5.
Step 5: Contour.

Sticking with the trusty Blank Canvas Palette I used the two darker shades mixing them together on my brush and contoured in the hollow of my cheeks, down the edges of my nose, along my jaw and temples. I then used the white powder to highlight: on the bridge of my nose, on the top of my cheekbones and bottom of my eyebrow bones, across the center of my forehead and chin. Don't worry it looks quite harsh at first and in the picture I applied a little more than I would so it would show up. The key to contouring is the blending. Blend it all together so there are no harsh lines.
I chose to contour on this look to give the face some structure and give a more bronzed effect which will complement the gold.
Step 6: Blush.

I chose to use Sleeks Blush in Lifes A Peach. It's a lovely coral colour which I thought would go with this look. I applied it to the apples of my cheeks before blending out towards my temples.
Step 7: Highlight.

Even though I'd already highlighted earlier I felt I needed a more of a shimmer look rather than a matte. I don't have a gold highlighter so I used this shimmery light gold eyeshadow from MUA Going For Gold palette. I applied this to center of my nose and the top of my cheekbones, blending it out to give a softer look.
Step 8: Eye/Lip Prep.

To prep my eyes I used "That gal" face brightening primer by Benefit. I know it's a face primer but because it's a brightening primer I decided to use this on my eyes. I just used trusty old Vaseline on my lips to soften and moisten my lips ready for my lipstick.
Step 9: Eye Base.

I love cream bases, they just seem to be perfect for applying eyeshadows over the top. I used Maybelline Colour 24hr Tattoo in On and On Bronze, I wanted to use Eternal Gold but I couldn't find it :(.
Step 10: Eyeshadow.

I used this shimmery gold shade over my lids to "gold" up that base haha. It's from the MUA Undressed Palette which is a dupe of the Urban Decay Naked Palette for a smidgen of the price.

Going back to the MUA Going For Gold Palette I used the darker Gold on the inner part to the middle of my lid and I used the lighter gold (The one I used for a highlighter) in the inner corner of my eye and under my brow bone.
Step 11: Eye Contour.

Going back to the MUA Undressed Palette I used the dark shimmery brown on the middle to outer corner of my eyes and then using the matte brown to add depth to the eyes. I brushed this through the crease of my eyelid bringing it down to my lower lash, it should form the shape shown in the picture. ">". When adding depth to the eyes it's better to use a matte colour rather than a shimmer, as shimmers catch light particles and stand out working like a highlighter.
Step 12: Eyeliner.

Using MUA Liner in black to line the outer corner of my lower lash line and up corner of my eyes to make my lashes look fuller, I then blend it out with my finger to the middle of my eye for a less harsh look.
Step 13: Mascara.

To finish the eyes I curl my eyelashes which makes me look more "awake" and helps widen the eyes. I then applied a coat of Max Factor False Lash Effect in black to give my lashes a full and thicker effect as I have pretty rubbish lashes.
Step 14: Brows.

I don't know if you've noticed but my right brow is higher up than the left and I have quite light brows which are very sparse, so I find filling them in finishes the look. I use B. Groomed Eyebrow Pencil in Hazel. I use light strokes for filling my brows in as it gives a more natural look, on my left brow I fill in from the top and on my right I fill in from the bottom to try and even them out lol.
Step 15: Lips.

I used three products on my lips, the first being Revlon Colorburst Matte balm in Audacious it's a pinky coral colour which I thought would compliment the eyes very well. I then used La Color Lipstick in a browny/gold glitter (It doesn't have a name) in the centre of my lips to give a slight ombre/sparkle. I finished of the lips with L'oreal Paris Glam Shine in Infinite Desert. It gives the lips a more plump look and blends the two colours together whilst adding some golden sparkle.
And that is my finished look for greed. I hope you like it and try it out for yourselves. I think this look is suitable for any occasion, whether it's a day out shopping or a lunch date. Let me know what you think in the comments and if you like this kind of blog post. If so, which look would you like to see next?
Sloth
Lust
Gluttony
Pride
Lust
Gluttony
Pride
Envy
Wrath.
Wrath.


